
(Editor’s Note: Today’s post is something a little different. My friend Sintechness (Twitter, Instagram) was kind enough to share his photo taking process. A lot went into this amazing photo of Funskool Ripper, and it’s fascinating to see how he accomplished such a great shot.)
I’m always amazed at great toy photography. I’m even more amazed when I see how it’s actually produced. My own process boils down to making a haphazard set on top of my stove (it gets the best natural lighting in the house, so shut up) and throwing some toys in it. That is literally all I do. But some people, such as Sintechness, go above and beyond with practical effects and dazzling artistry.
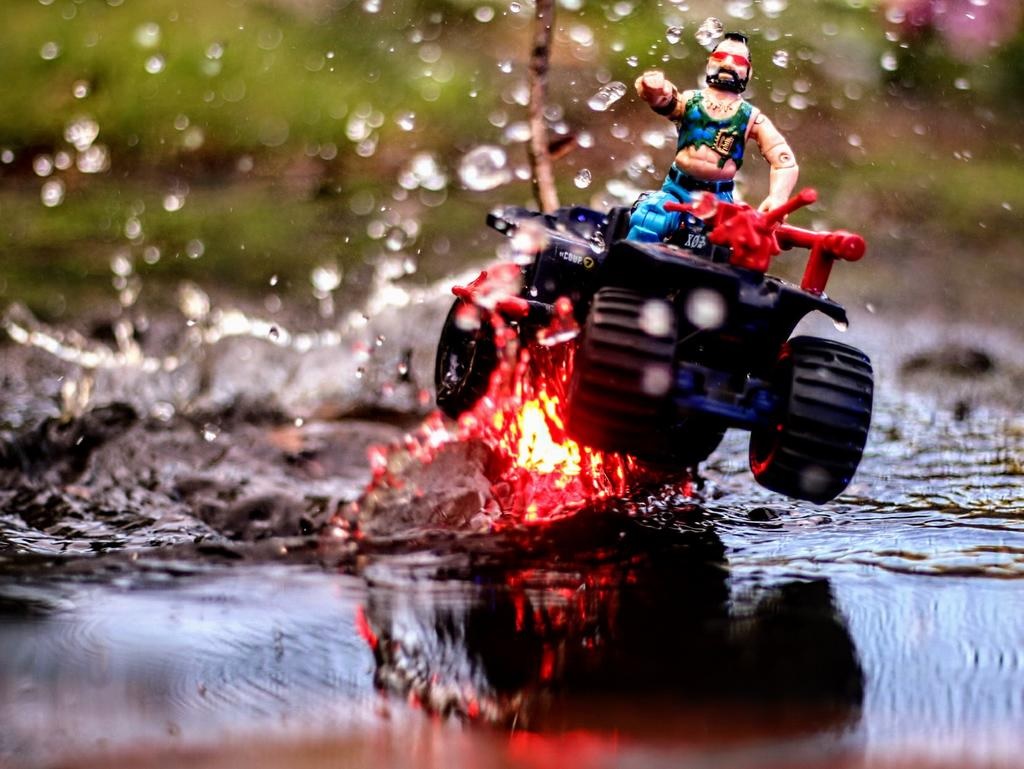
Here’s what went into making this incredible photo of everyone’s favorite Funskool Dreadnok.
Article by Sintechness
The special tools for this session. A twig and a air gun.

It just rained by me so puddles are great for a scene.

Twig goes in the mud.

Trial and error with balancing the subject and getting the right angle.

Finished product with air gun providing splash, fast shutter speed, and some pop on the final.
Signing Off
Huge thanks to Sintechness! What an incredible photo and a fascinating process. I’m just pleased as punch to share it with you.
What extreme lengths have you gone to when it comes to capturing the perfect toy photo? Let us know in the comments!
